Transfer templates
Transfer templates are available on Pro and Business plans.
Transfer templates allow you to create structured and reusable upload forms. Each template defines exactly which files to collect, with what constraints (required, multiple…). Share the template URL with your contacts to collect documents in a standardized way.
When to use a template?
- You need to collect multiple distinct types of documents (ID, proof of address, contract…)
- You want to indicate which ones are required and which are optional
- You want to display a personalized welcome message to the sender
- You regularly collect the same types of files (client onboarding, application, audit…)
- You do not want to share your email address to receive files, or want to avoid attachments in your inbox
Creating a template
- Go to Dashboard > Transfers > Transfer templates
- Click on Add a transfer template
- Enter the name of the template (internal use)
- Write a welcome message (displayed to the sender before they send their files)
- Add items: click on Add an item for each expected document type
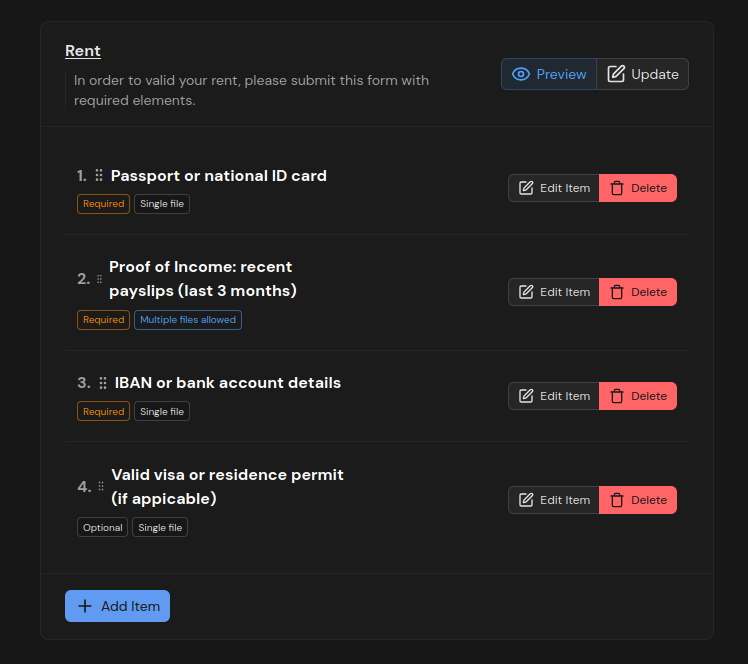
Configuring an item
Each item has the following properties:
| Property | Description |
|---|---|
| Name | Label displayed to the sender (e.g.: "ID document") |
| Required | The sender must provide this file in order to send |
| Multiple | Allows uploading multiple files for this item |
You can reorder items by drag and drop.
Sharing the template link
Once the template is created, its link is available from the Transfer templates list via Copy
transfer link. This link points to an upload page dedicated to this template: /upload/custom/[id].
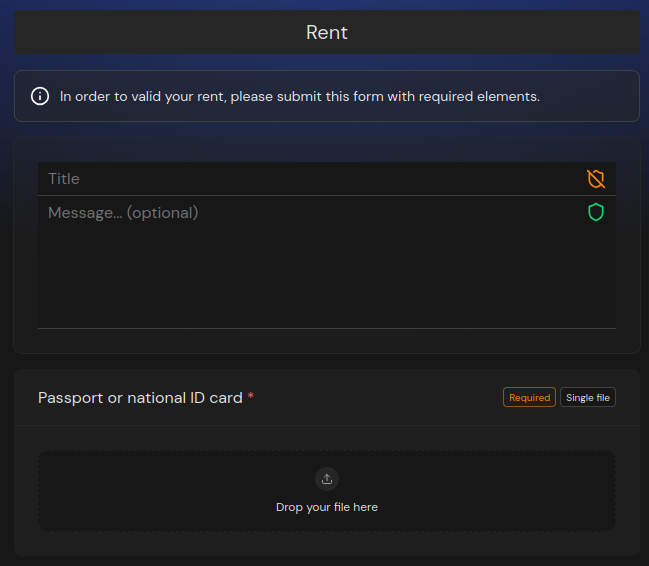
You can also click on Preview from the template edit page to see exactly what the sender will see.
What the sender sees
The sender arrives on a page with the template's welcome message, then sees each item as a separate drop area, with required or optional mentioned.
They cannot send until the required items are filled in. They then click on Send to finalize.
Viewing received transfers
Files sent via a template appear in Dashboard > Transfers > Received for me, organized by template item. You can download each file individually or download everything at once.
Transfer to a data room
From the view of a received transfer, a Transfer to a data room button is available for each file or group of files. It copies the files directly into a data room of your choice, without an intermediate download. The files are re-encrypted on the fly for the members of the target data room.
Managing your templates
From Dashboard > Transfers > Transfer templates:
| Action | Description |
|---|---|
| Edit transfer template | Edit the name, message, or items |
| Delete transfer template | Permanently delete the template (existing transfers are not affected) |
| Copy transfer link | Retrieve the URL to share |
| Preview | Preview the form as the sender will see it |