Deposit form
The deposit form is available on the Business plan.
The deposit form lets you collect specific documents through a structured, reusable form. You define exactly which files are expected, with which constraints (required, multiple…), then you share the form's URL with your contacts.
When to use a deposit form?
- You need to collect several distinct document types (ID, proof of address, contract…)
- You want to indicate which ones are required and which are optional
- You want to display a personalized welcome message to the sender
- You regularly collect the same file types (client onboarding, job application, audit…)
- You do not want to share your email address to receive files, or avoid attachments in your inbox
Create a deposit form
- Go to Dashboard > Deposit box > Add a deposit
- Choose Deposit form
- Enter the form name (internal use)
- Write a welcome message (shown to the sender before they send their files)
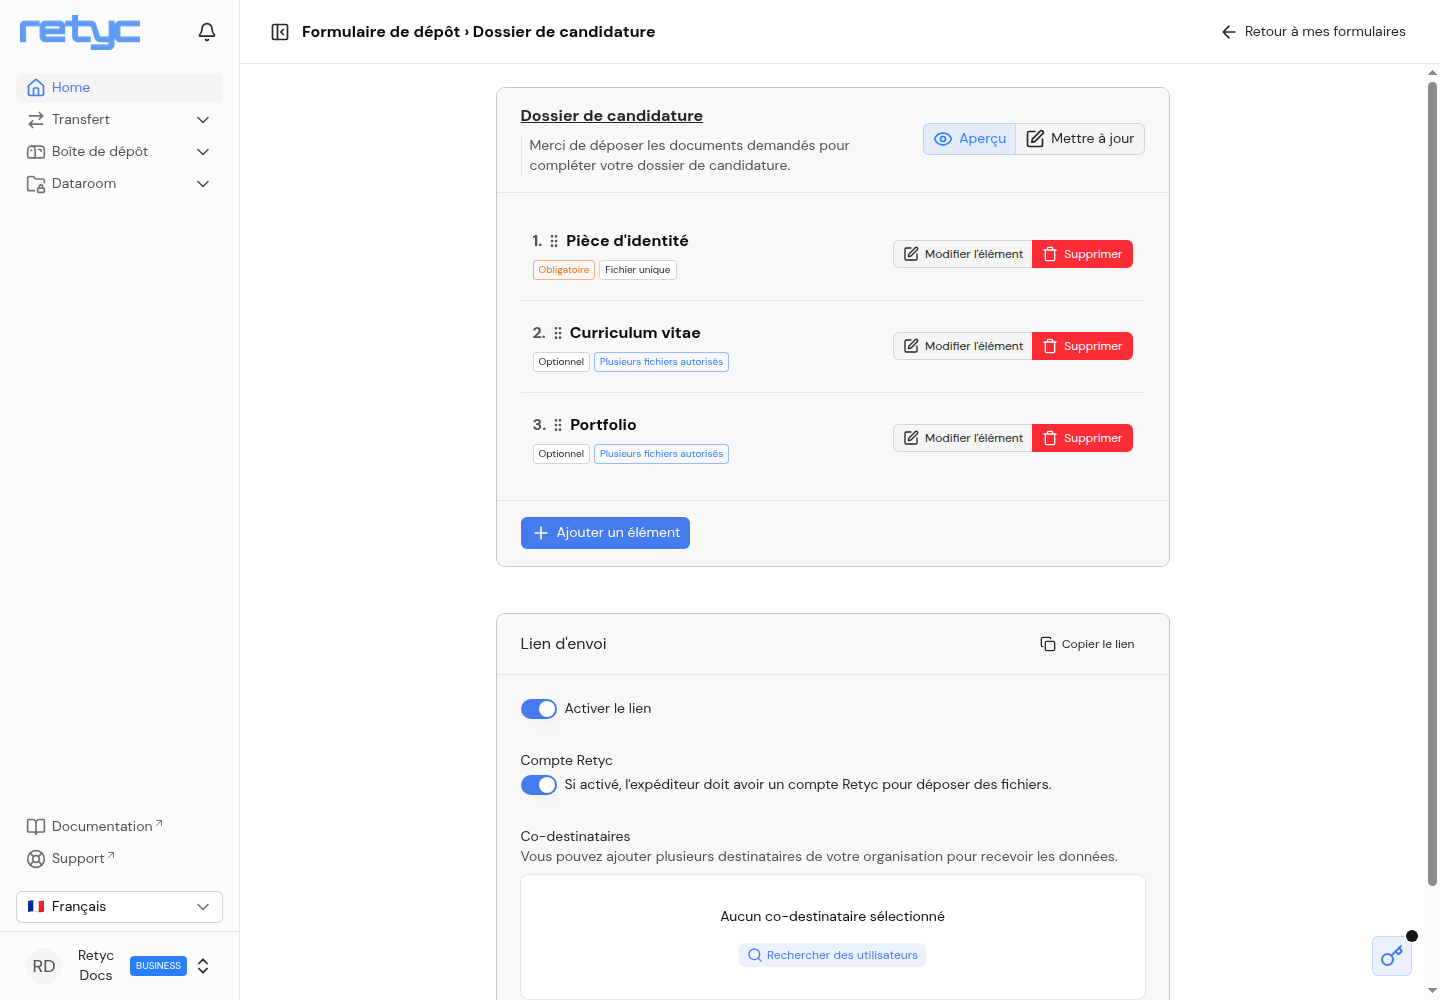
- Add items: click Add item for each expected document type
Configure an item
Each item has the following properties:
| Property | Description |
|---|---|
| Name | Label shown to the sender (e.g. "ID document") |
| Required | The sender must provide this file in order to send |
| Multiple files allowed | Allows depositing several files for this item |
You can reorder items by drag and drop.
A form with no item cannot be activated: add at least one item so its link becomes usable.
Link options
As with a deposit link, you can choose whether a Retyc account is required or optional to deposit, and add co-recipients who are members of your organization.
Share the form link
Once the form is created, its link is available from Deposit box > My deposits, Deposit form tab, via Copy link.
What the sender sees
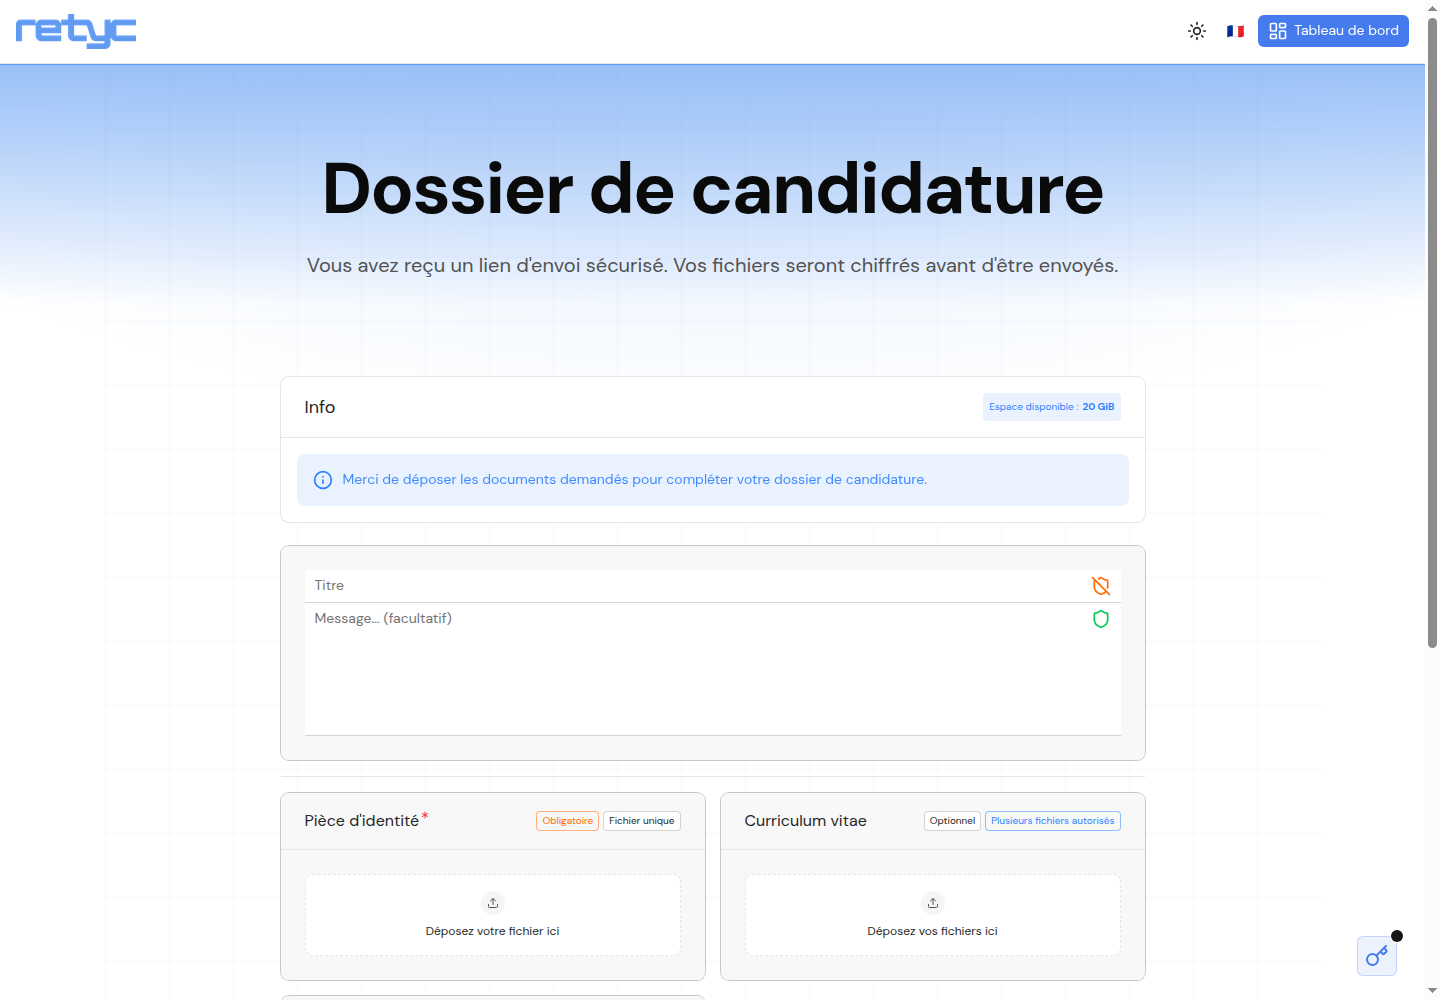
The sender arrives on a page with the form's welcome message, then sees each item as a separate drop zone, marked required or optional.
They cannot send until the required items are filled in. They then click Send to finish. No plan is required to deposit: a free account is enough, or even no account at all if you made it optional. Each send is limited to 100 MB.
View received files
Files sent through a form appear under Dashboard > Transfer > Inbox, organized by form item. You can download each file individually or all of them at once.
Copy to a dataroom
From a received transfer view, you can copy the files directly into a dataroom of your choice, without an intermediate download. See Copy to a dataroom.
Manage your forms
From Deposit box > My deposits, Deposit form tab:
| Action | Description |
|---|---|
| Edit | Edit the name, message, or items |
| Delete deposit form | Permanently delete the form (files already received are not affected) |
| Copy link | Get the URL to share |